|
How to fit a Seip EKR1MCG receiver
to Seip garage door operator models
C75, C100 & M50
Click image to enlarge
Connect the Seip EKR1MCG receiver as follows:
Black wire to terminal G
Red wire to terminal H
The two blue wires to terminals A & B
with the wires from the wall mounted
pushbutton switch (if fitted) |
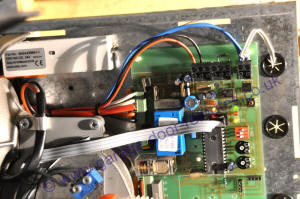
How to fit a Seip EKR1MCG receiver
to Seip garage door operator models
A45 & A60 & ST77 (late pcb version)
Click image to enlarge
Connect the Seip EKR1MCG receiver as follows:
Black wire to terminal 12
Red wire to terminal 13
The two blue wires to terminals C & D
with the wires from the wall mounted
pushbutton switch (if fitted) |
|
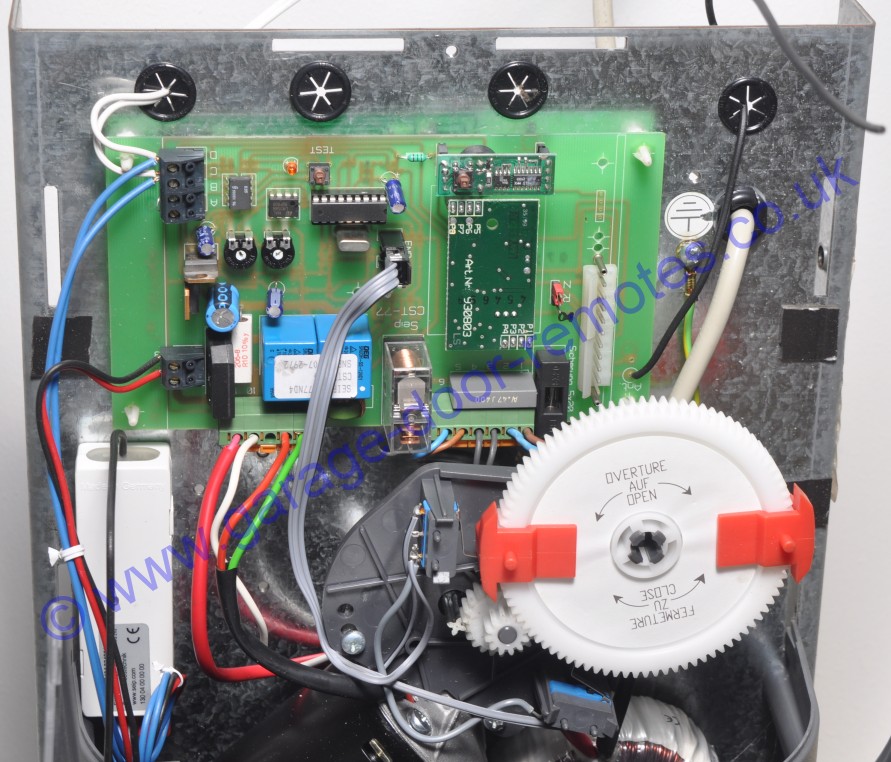
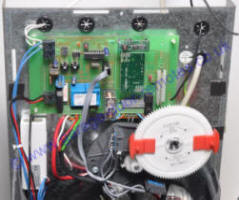
How to fit a Seip EKR1MCG receiver
to Seip garage door operator models
APM60, APM80, UK60, UK80, UK100
Click image to enlarge

view wiring diagram
Connect the Seip EKR1MCG receiver as follows:
Black wire to terminal 3
Red wire to terminal 4
The two blue wires to terminals C & D
with the wires from the wall mounted
pushbutton switch (if fitted)
Handy Tip: to allow better access to terminals
3 and 4,
release the circuit board from the three
mounting pillars |
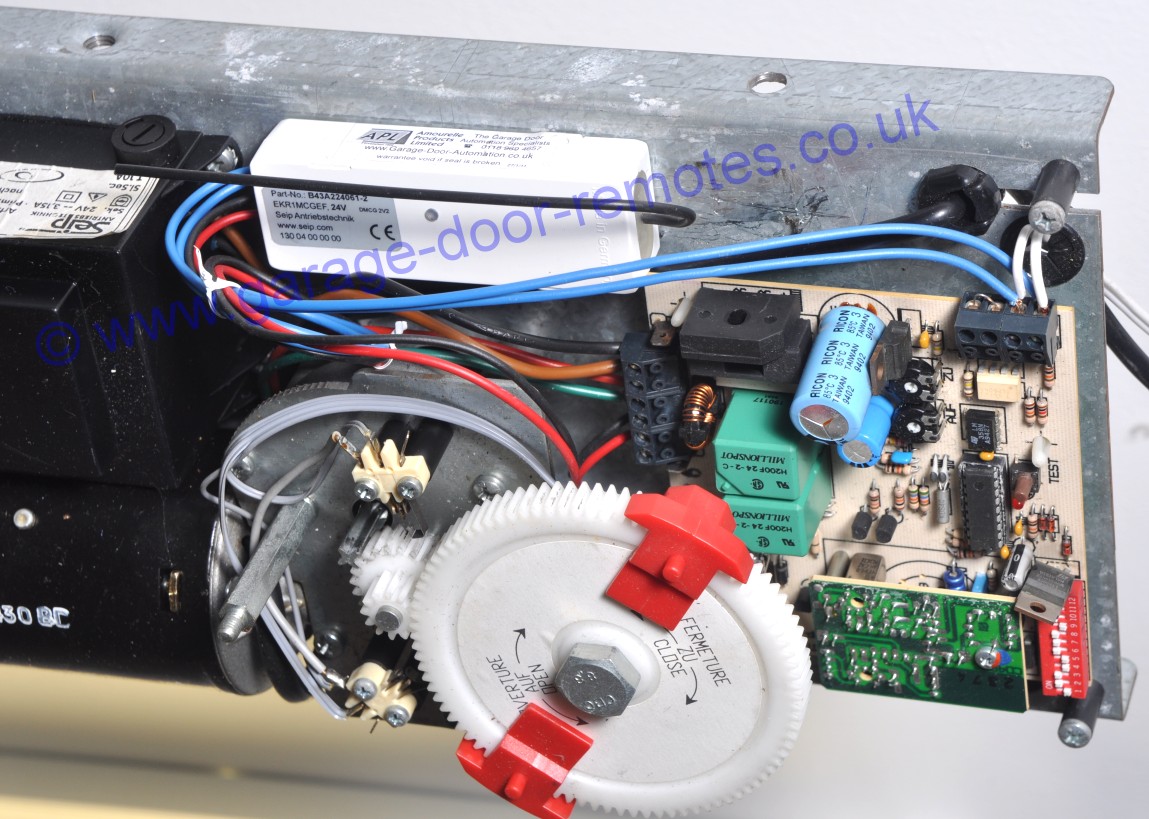
How to fit a Seip EKR1MCG receiver
to Seip garage door operator models
ST60, ST77, ST77M & ST100
(also early A45 & A60 models)
Click image to enlarge
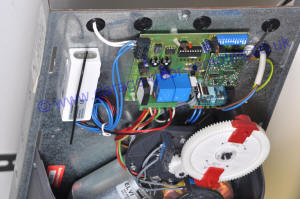
view wiring
diagram
Connect the Seip EKR1MCG receiver as follows:
Black wire to terminal 7
Red wire to terminal 8
The two blue wires to terminals C & D
with the wires from the wall mounted
pushbutton switch (if fitted)
Handy Tip: to allow better access to terminals 7 and 8,
release the circuit board from the three
mounting pillars |
|
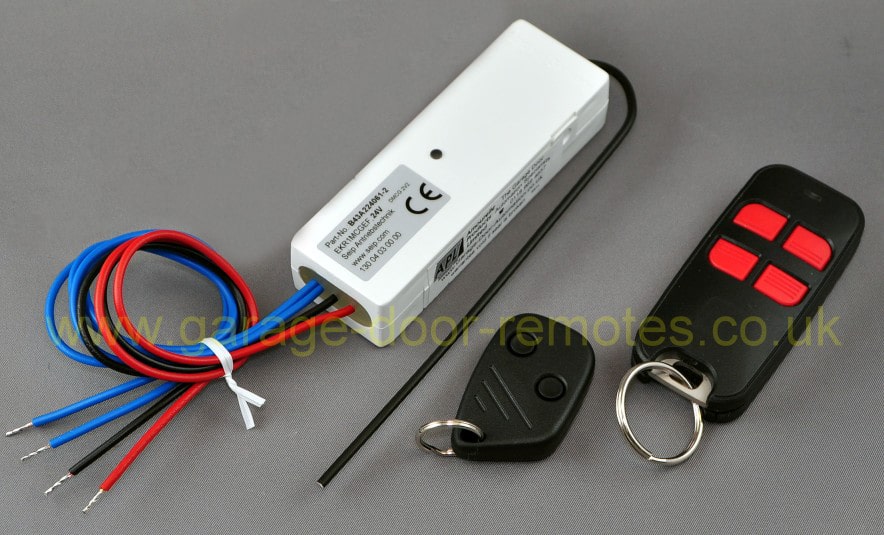
The original on-board receiver unit can be
un-plugged from the main PCB & discarded
(see F.A.Q.)
The two wires from the wall mounted
pushbutton switch
(if installed) should remain connected to the PCB
with the blue wires from the new receiver unit
Note: It's essential that your electric operator functions normally from the wired-in pushbutton so
please confirm that your door operator works properly from this before ordering a remote control
receiver upgrade kit.
If a wall mounted pushbutton switch has not been installed you can use the small
pushbutton within the Seip operator motor unit casing marked 'TEST', this button
should start the operator.
(for pushbutton connections refer to the details
or your specific operator model on this page) |
|
Seip Easy SM100 & SM120 door operators
These models have a stand-by power feature
that shuts down the 24V ancillary supply after a
few minutes so it will be necessary to power the
new remote control receiver from a separate
source and connect the pair of switching wires
to terminals 1 & 2 (with
the wires from the
wall mounted
pushbutton switch if fitted)
Click on the following link for details of
a suitable mains powered receiver kit
Seip mains powered receiver
For upgrade
kits to suit other
makes
of garage
door operator
click here |