Installation Instructions - Sentry 433Mhz remote control system
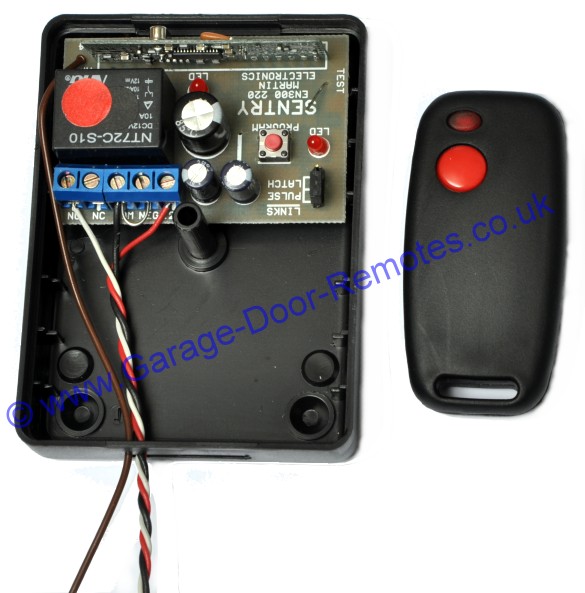
SEN/R/R1
receiver & SEN/R/T1 keyfob
(with cover removed)
Compatibility
Suitable for
use with all remote controlled operators having an external
receiver connected with three terminals
Electrical
Connections
The
receiver is supplied pre-wired with coloured wires, connect
the wires to
the garage door opener motor unit as follows:
Connect
black wire to electric operator terminal 1
(common - negative/ground)
Connect white
wire to operator terminal 2
(normally open - relay contact)
Connect red wire to operator terminal 3
(12V - 24V DC/AC power supply source
Position the brown aerial wire away from other wiring or metalwork
Positioning
The
receiver unit should be mounted in a position away from metal
obstructions and as high as is practical. In most cases range will be
increased by mounting the receiver vertically with the brown aerial wire
hanging downwards. The receiver unit can be screwed into position or mounted with the
self-adhesive Velcro pads.
keyfob
Battery Replacement
Remove
the fixing screw on the back cover
and open the keyfob casing to reveal a 12 volt car
alarm battery type LR-23A (available
from most car accessory shops)
Digital code system
The
keyfob transmitters communicate to the receiver by digitally coded transmission. The
security code is user set by means of
twelve switches inside the keyfob transmitter providing a choice of
4096 different security codes, the receiver
unit can learn & memorize the security code from keyfob transmitter
electronically.
Code Programming - Important
All Keyfobs are
supplied set to a standard factory code so
a unique code should be set on
installation as follows:
Remove the screw
on back then open the keyfob(s) and locate the twelve way code switch inside,
remove the yellow tape from the switch block and set a random on/ off sequence on the
12 switches, (if you
have more than one keyfob, all must be set to the same code)
To teach the receiver the
new security code, access is required to the receiver. With the
cover of the receiver removed, locate the small red button at the top RH
corner of the printed circuit board and press it for approximately one
second. The LED will illuminate
briefly when the button is pressed. The next step is to hold the
keyfob transmitter approximately 2 metres away from the receiver and press
the button on your keyfob for approximately half a second. The
LED on the receiver will light for one second to confirm that the
security code has been learnt.
|
|
SEN/R/T1 keyfob transmitter dimensions 66mm x 33mm x 14mm |

Range - up to 100Mtrs
433.920Mhz MPT 1340 UK approved frequency
![]()
![]()
• Sentry Receivers •
• Spares
& Accessories • Door Security •
•
Customers Feedback Comments
•
• Site Index •
Home Page •
Contact Us •